Back to blog
6-Foot Picnic Table Build (Simple + Cheap, Under $100)
March 30, 2026 by Tyler Boni
A quick, low-cost 6-foot picnic table build you can finish in a day for under $100 with basic tools and standard lumber.
March 30, 2026 by Tyler Boni
A quick, low-cost 6-foot picnic table build you can finish in a day for under $100 with basic tools and standard lumber.
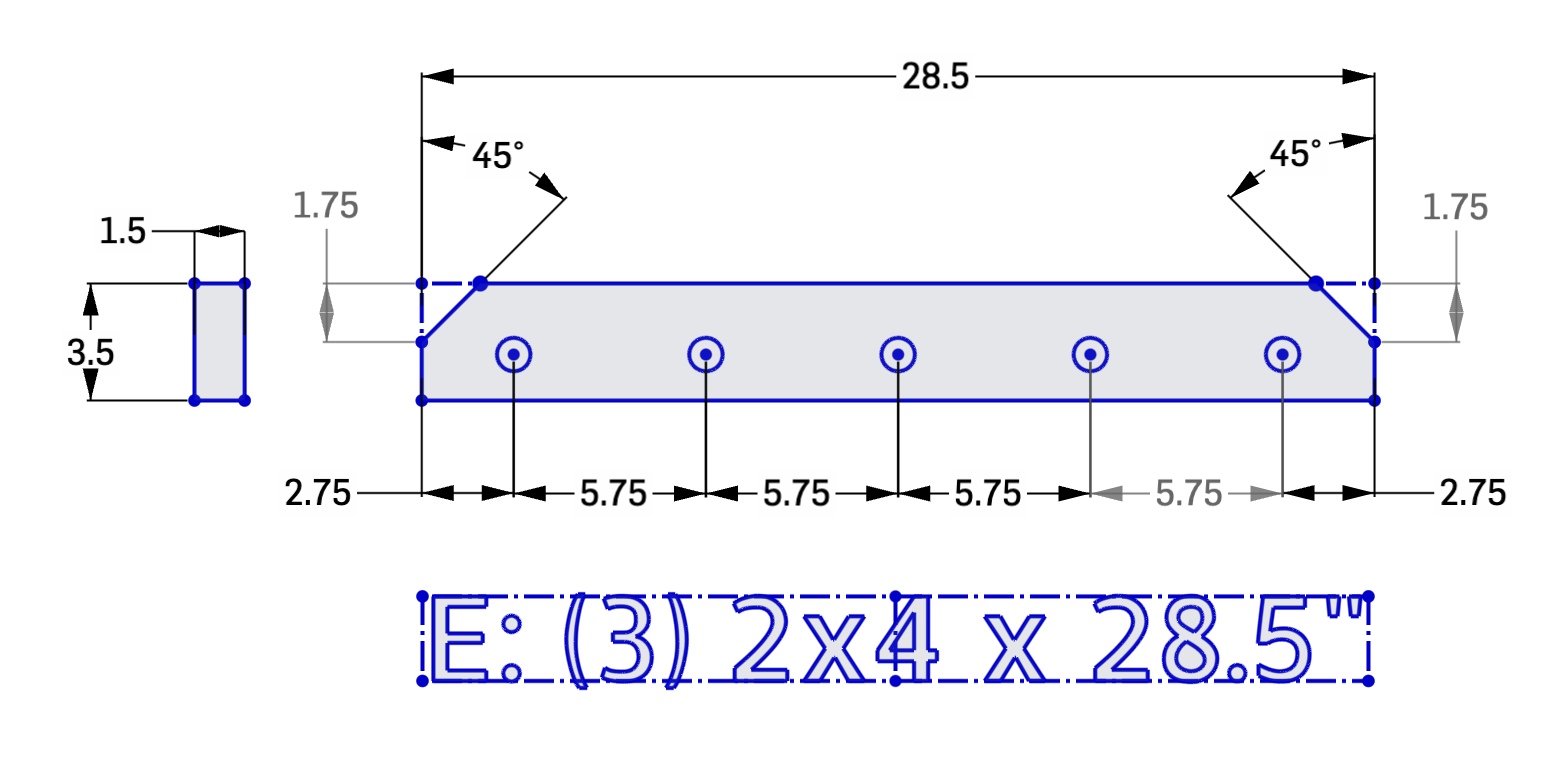
This is a traditional 6-foot picnic table build that is strong, affordable, and realistic to complete in a day if you prep your cuts first. It is a practical backyard project: solid enough for regular use, simple enough for a weekend builder, and locked together with exterior screws plus wood glue for long-term strength. This took me roughly 3 hours from start to finish and landed under $100 in materials, making it a perfect summer-prep project.
Expected time: about 3 hours.
Tools used:
Cut list:
Shopping list:
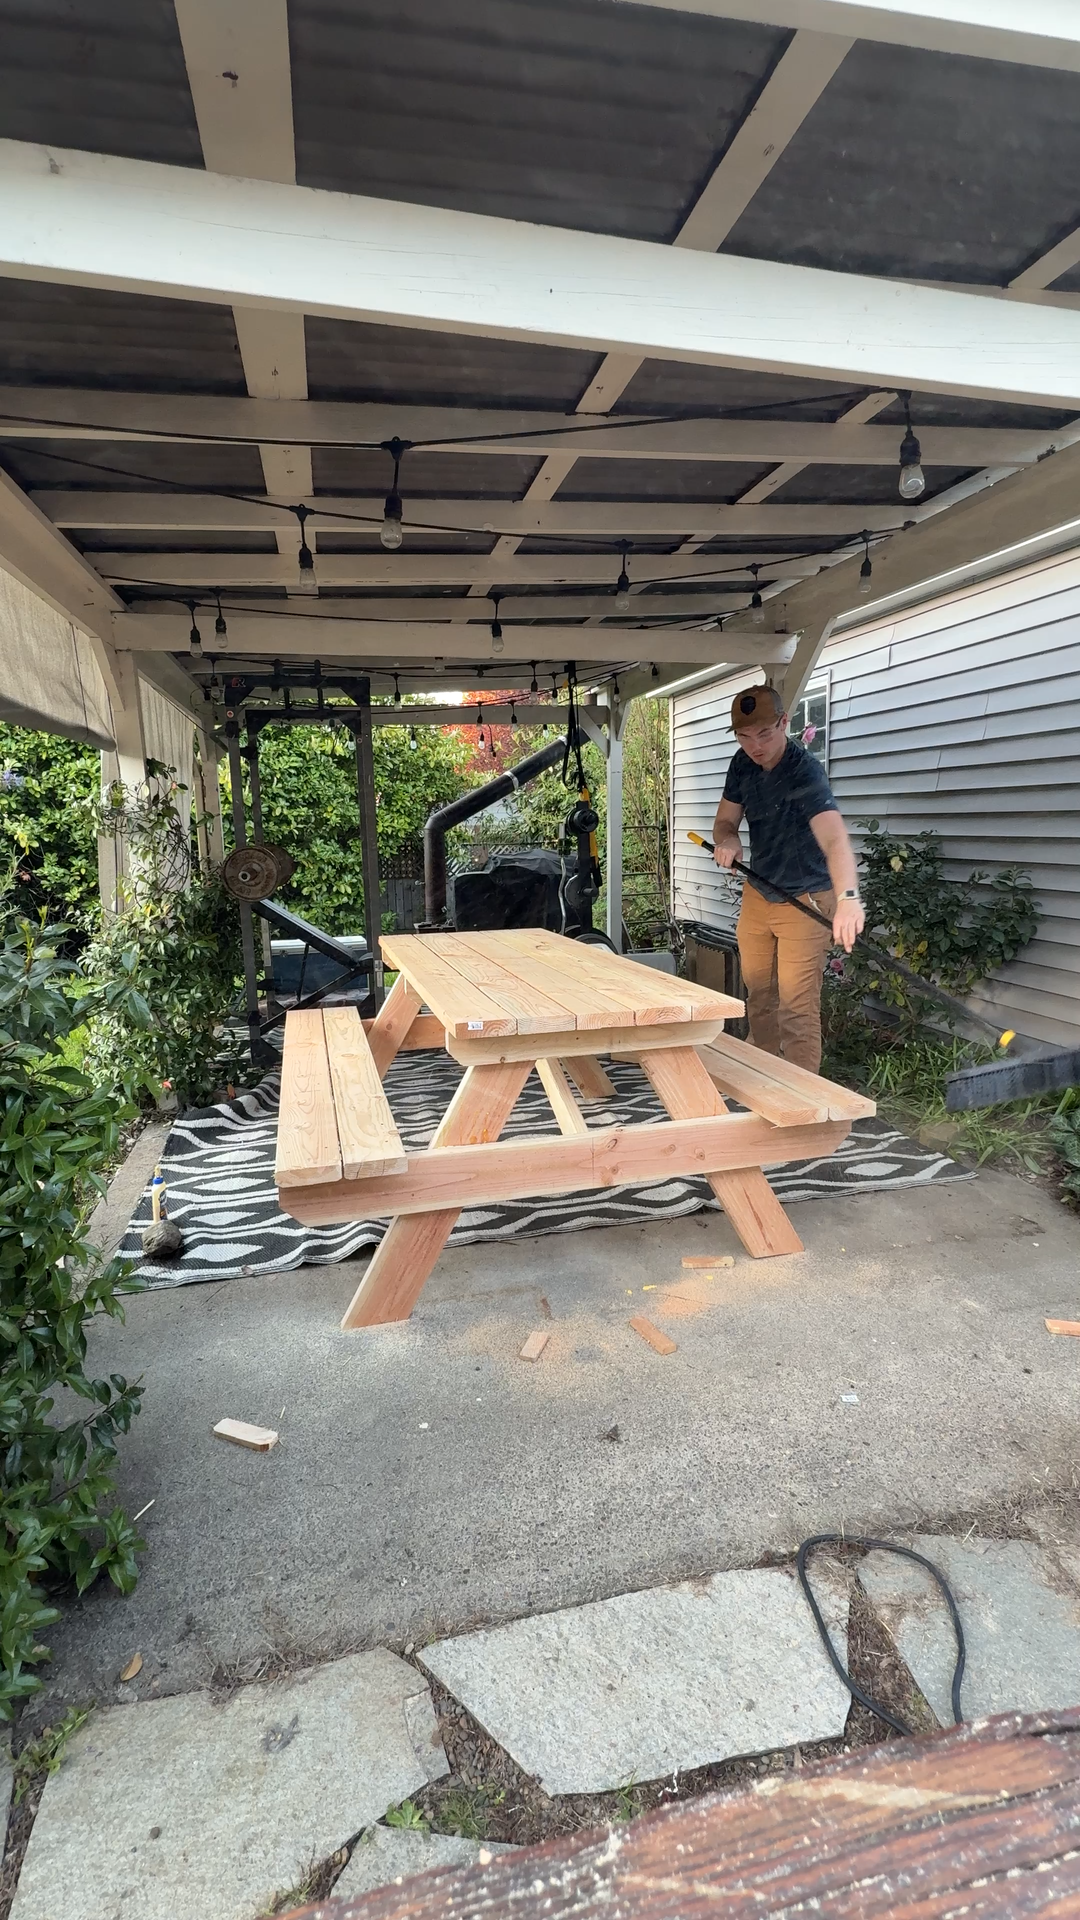
Nominal 2×6 is about 5.5 in × 1.5 in; nominal 2×4 is about 3.5 in × 1.5 in.
30° bevels on both ends, tip-to-tip length 36 in; horizontal run of each angled face about 3.125 in.
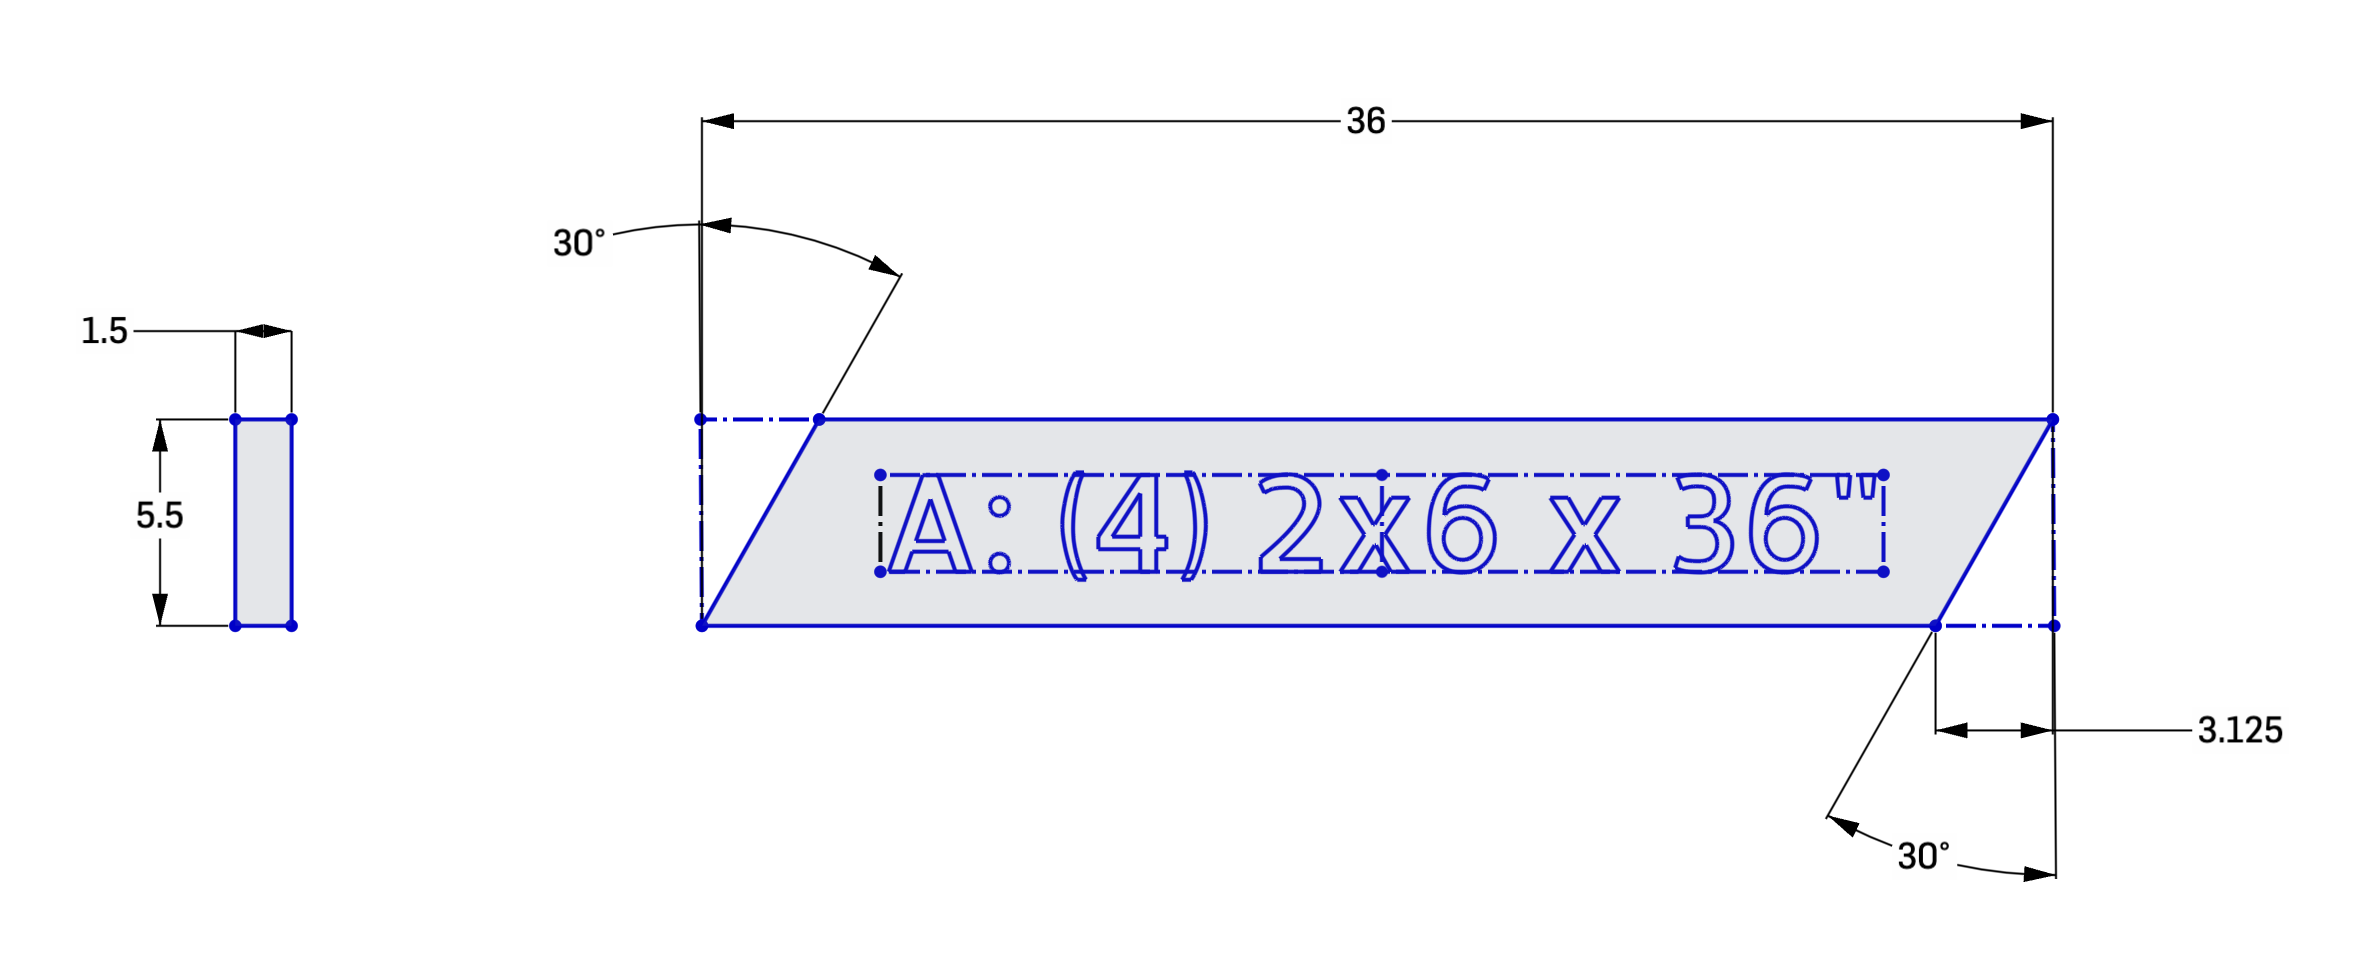
45° miters at both ends; 2.75 in in from each bottom corner along the long edge before the cut (top edge stays 60 in).
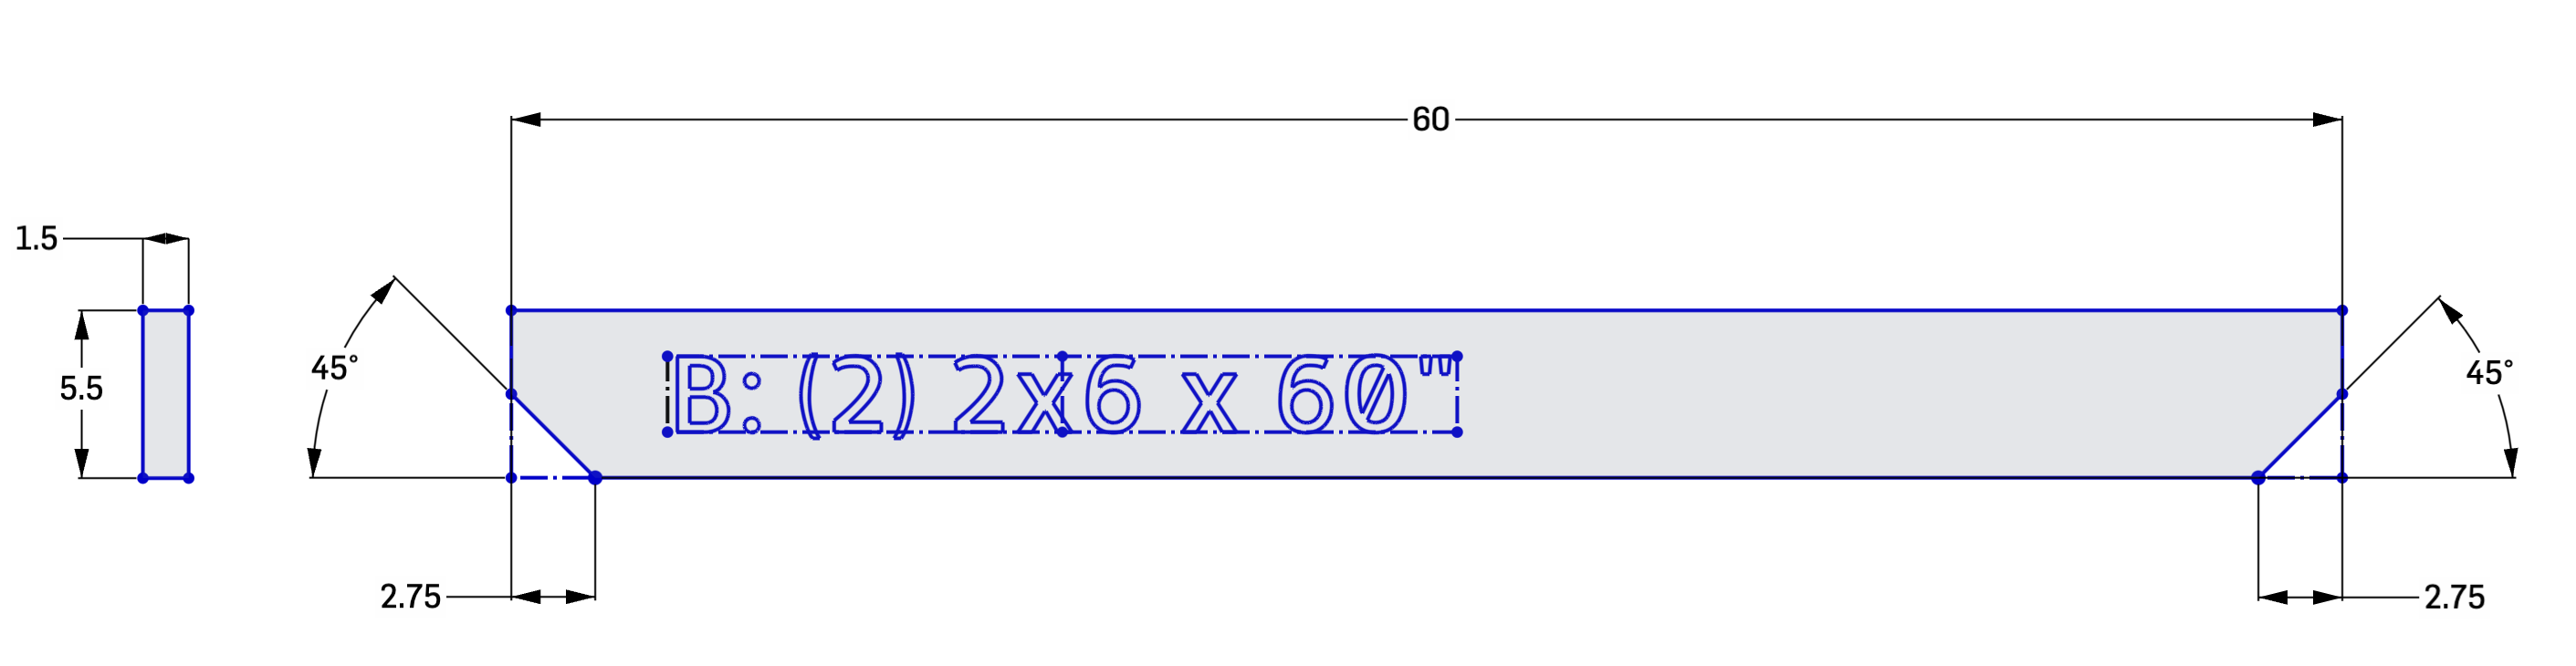
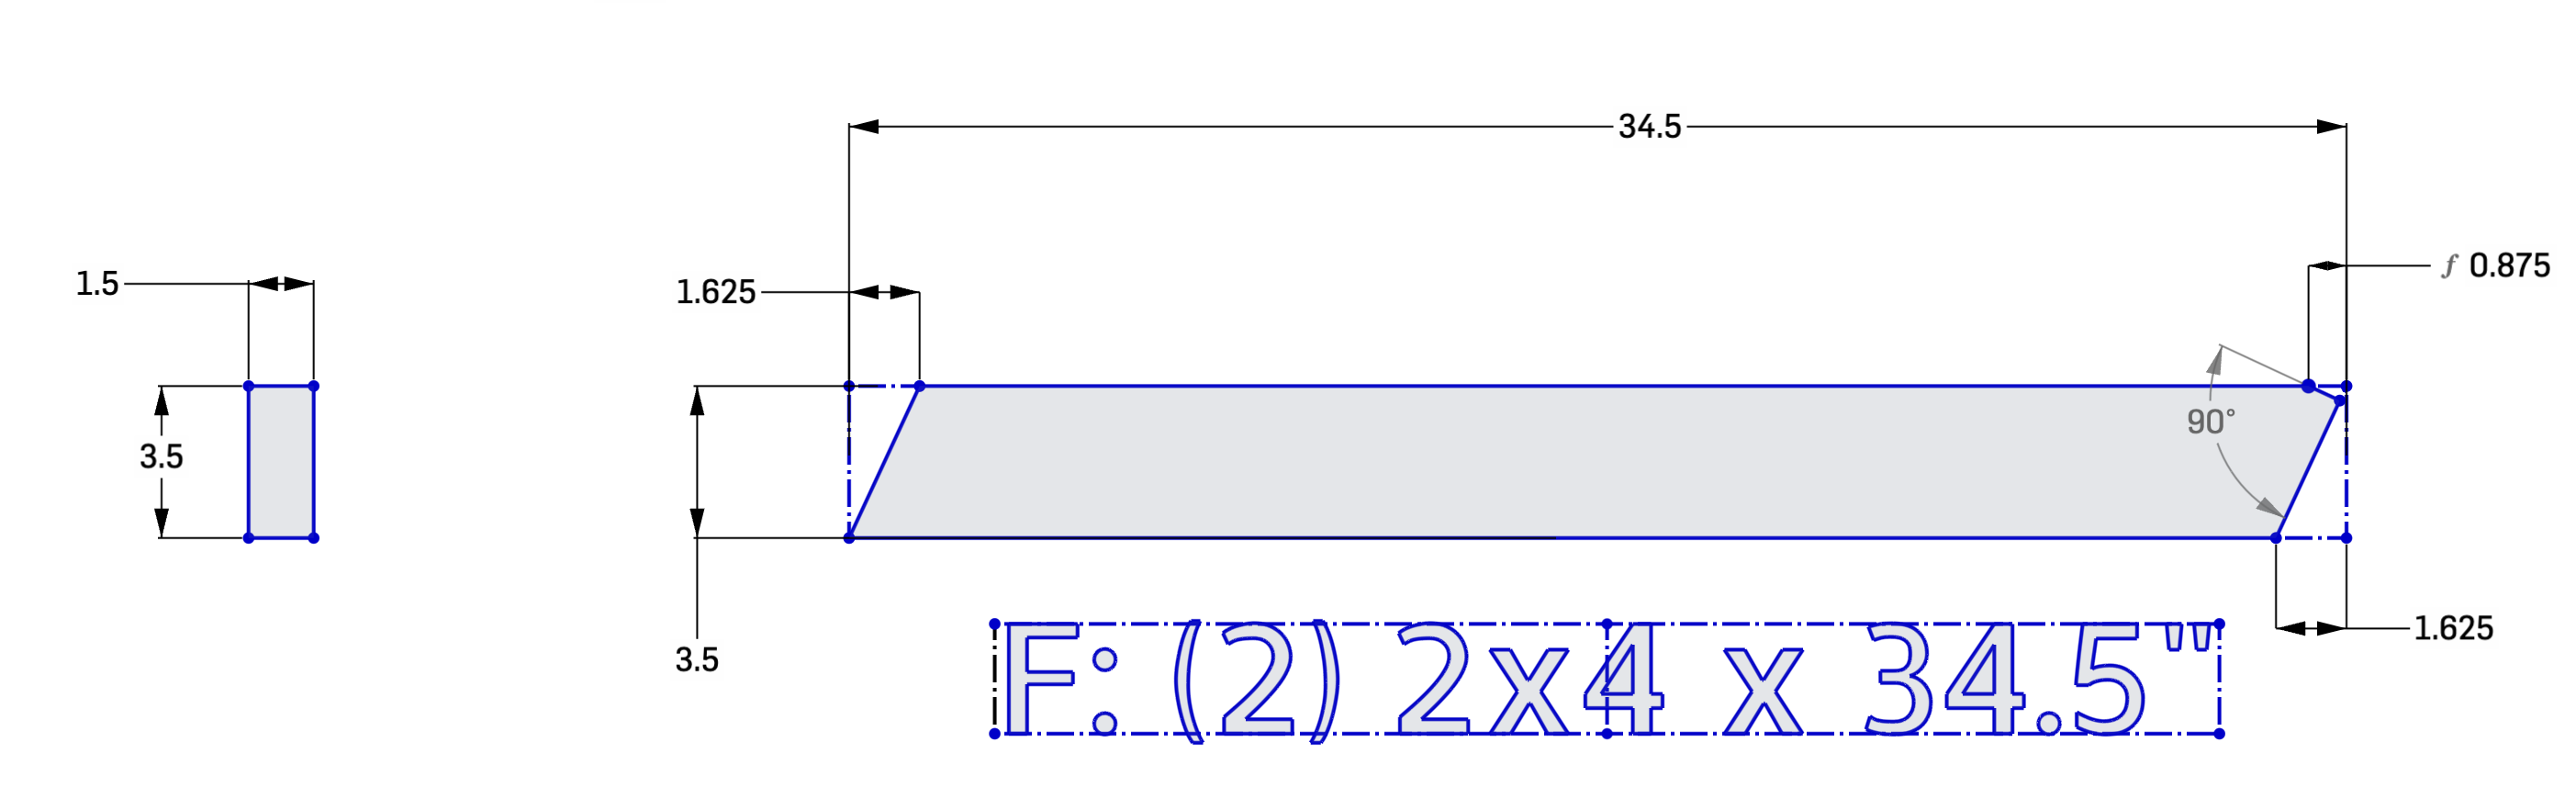
45° cuts at the top corners starting 1.75 in down from the top; five pocketholes along the piece, outer holes 2.75 in from each end, 5.75 in between hole centers (for screws into the tabletop slats).
Compound layout per plan: 1.625 in horizontal offset on the angled ends and a small 0.875 in detail at the top corner as shown.
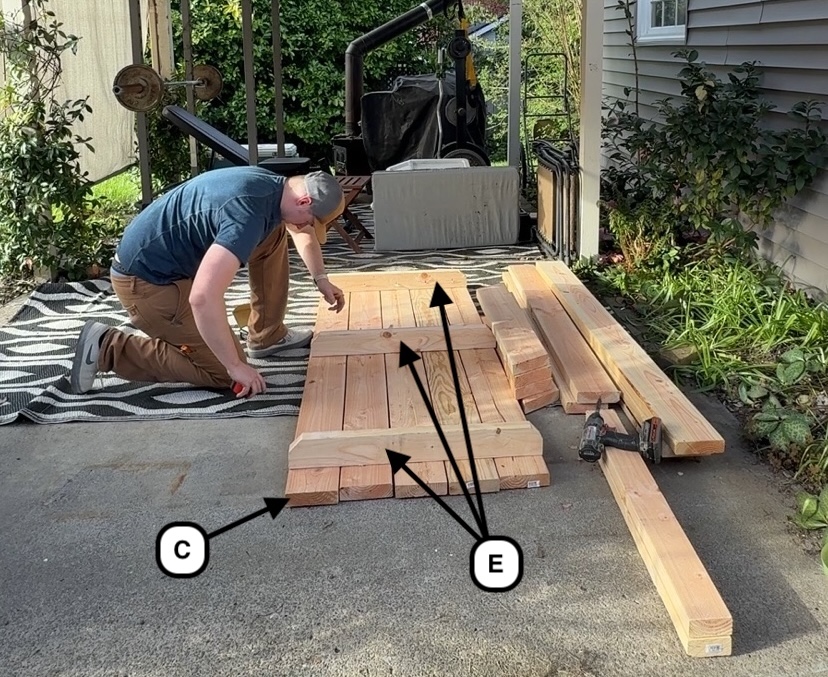
Drill pocket holes in the tabletop supports (part E) as shown in the diagrams. Lay out the five 72 in tabletop slats on a flat surface. Use 1/4 in spacers (scrap plywood works well) between slats for consistent gaps. Position the supports evenly over the slats and screw them in place.
The end supports are set in 4", and the center support is centered between them with a gap of 29.75".
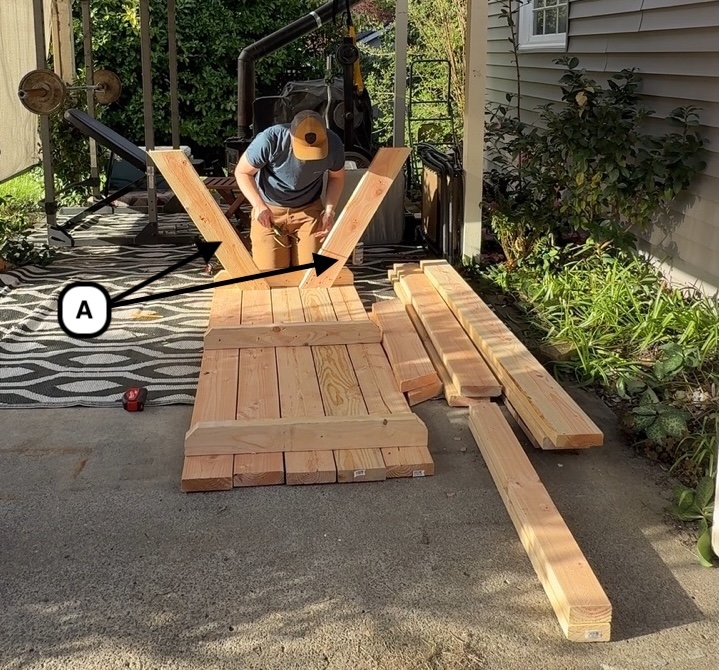
Clamp the legs (part A) to the support structure and drill pilot holes. Add wood glue at each mating surface, then drive exterior screws to lock the joints tight. Predrilling helps prevent splitting.
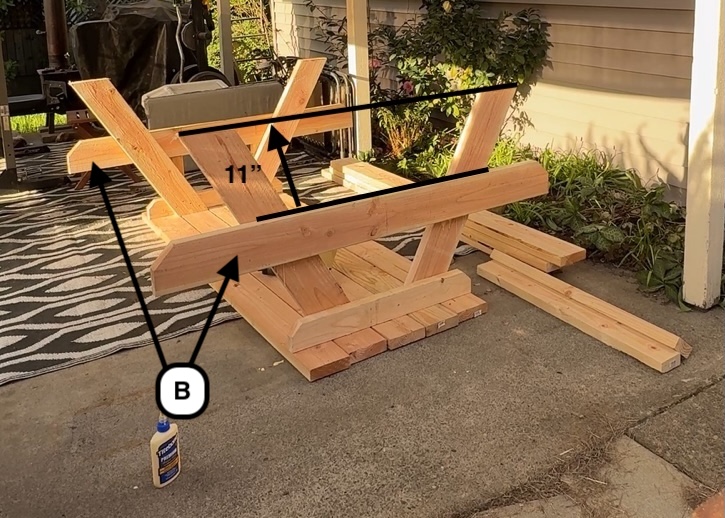
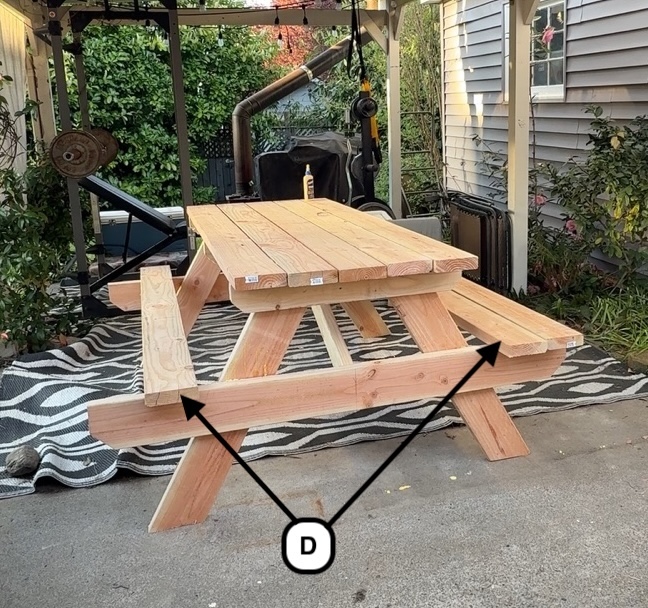
Clamp the seat supports (part B) to the legs. Keep them level before drilling, then glue and screw them into place. I placed the bottom of my 2x6 11" from where the ground will be. This turned out to be a good height for most people.
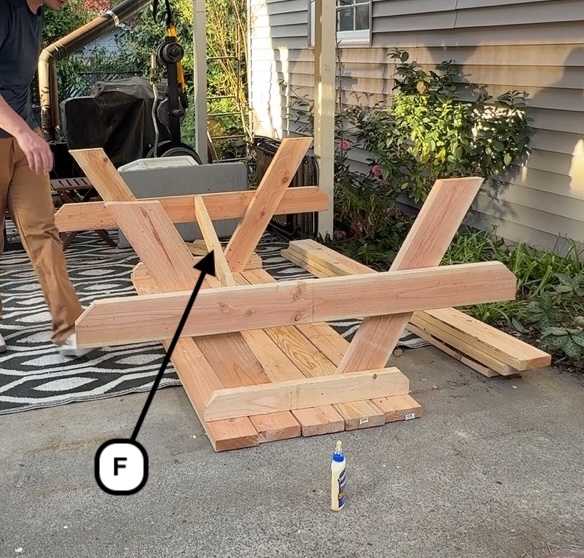
Fasten parts F with 2 1/2 in screws after checking for square and rechecking leg plumb.
Center the seat slats, predrill, and fasten with 2 1/2 in screws. Countersink fasteners so clothing does not snag and water does not sit in the screw pockets.
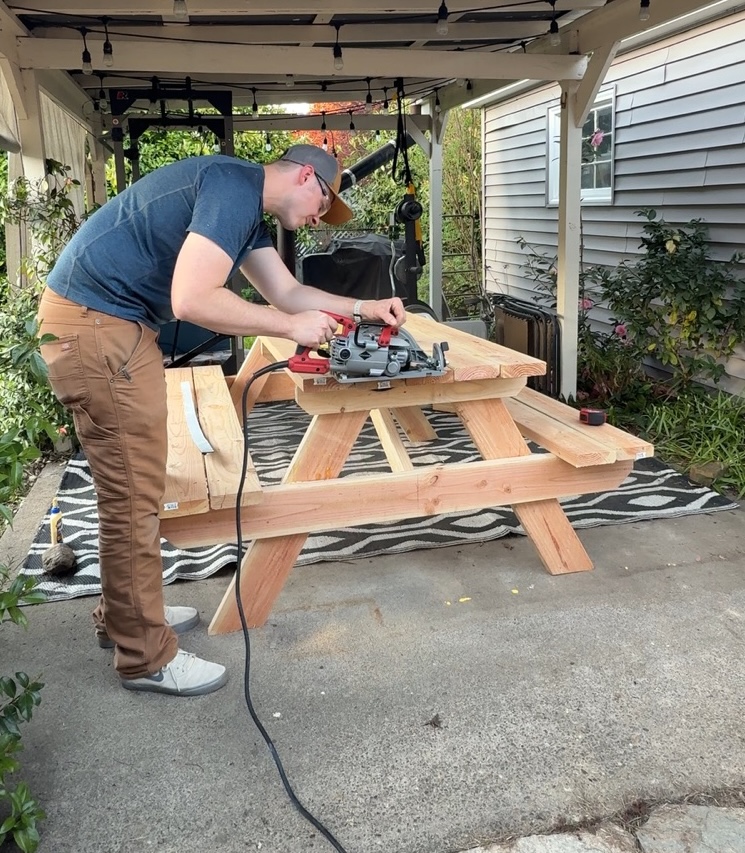
Once the frame and slats are together, the long edges of the top rarely line up perfectly. I ran a skilsaw along each end with a straightedge as a guide so both sides of the tabletop are square and flush. Support any offcut so it does not bind the blade, keep safety glasses on, and let the saw do the work.
This write-up is inspired by the MyOutdoorPlans 6-foot picnic table plan, check them out at https://myoutdoorplans.com/furniture/6-foot-picnic-table-plans/